2

How To Create Consistent Visual Branding Through Beauty Photography

In the beauty industry, consistent visual branding acts as a silent ambassador for your brand, conveying its identity, values, and promise to your audience. The goal is for customers to instantly recognize your brand when they see your photography, even without a logo. Achieving this level of recognition requires a strategic approach, one that establishes a visual language uniquely yours and resonates across every touchpoint, from your website and social media to print campaigns and in-store displays.

Understanding the key elements of visual branding is the first step toward creating this recognizable identity. In this article, we’ll explore the core components of effective beauty photography and provide practical guidance to help you implement a consistent, compelling visual strategy for your brand.

Understanding Visual Branding in Beauty Photography

Visual branding in beauty product photography is about using consistent styling, lighting, color palettes, and composition to clearly express what the brand stands for. It goes beyond simply capturing attractive product shots. Instead, it involves creating a visual language that communicates the product’s purpose, personality, and value. For example, is the brand positioned as luxurious and premium, or playful and approachable? These characteristics should be immediately recognizable in every product image.

A strong visual identity helps beauty products stand out in a crowded and highly competitive market. Consistency in how products are photographed supports brand recognition, strengthens credibility, and reinforces trust. When consumers repeatedly see the same visual tone across packaging shots, flat lays, textures, swatches, and campaign visuals, they develop a clear understanding of the brand’s promise and quality.

Key Elements of Consistent Beauty Photography

Color Palette and Tone

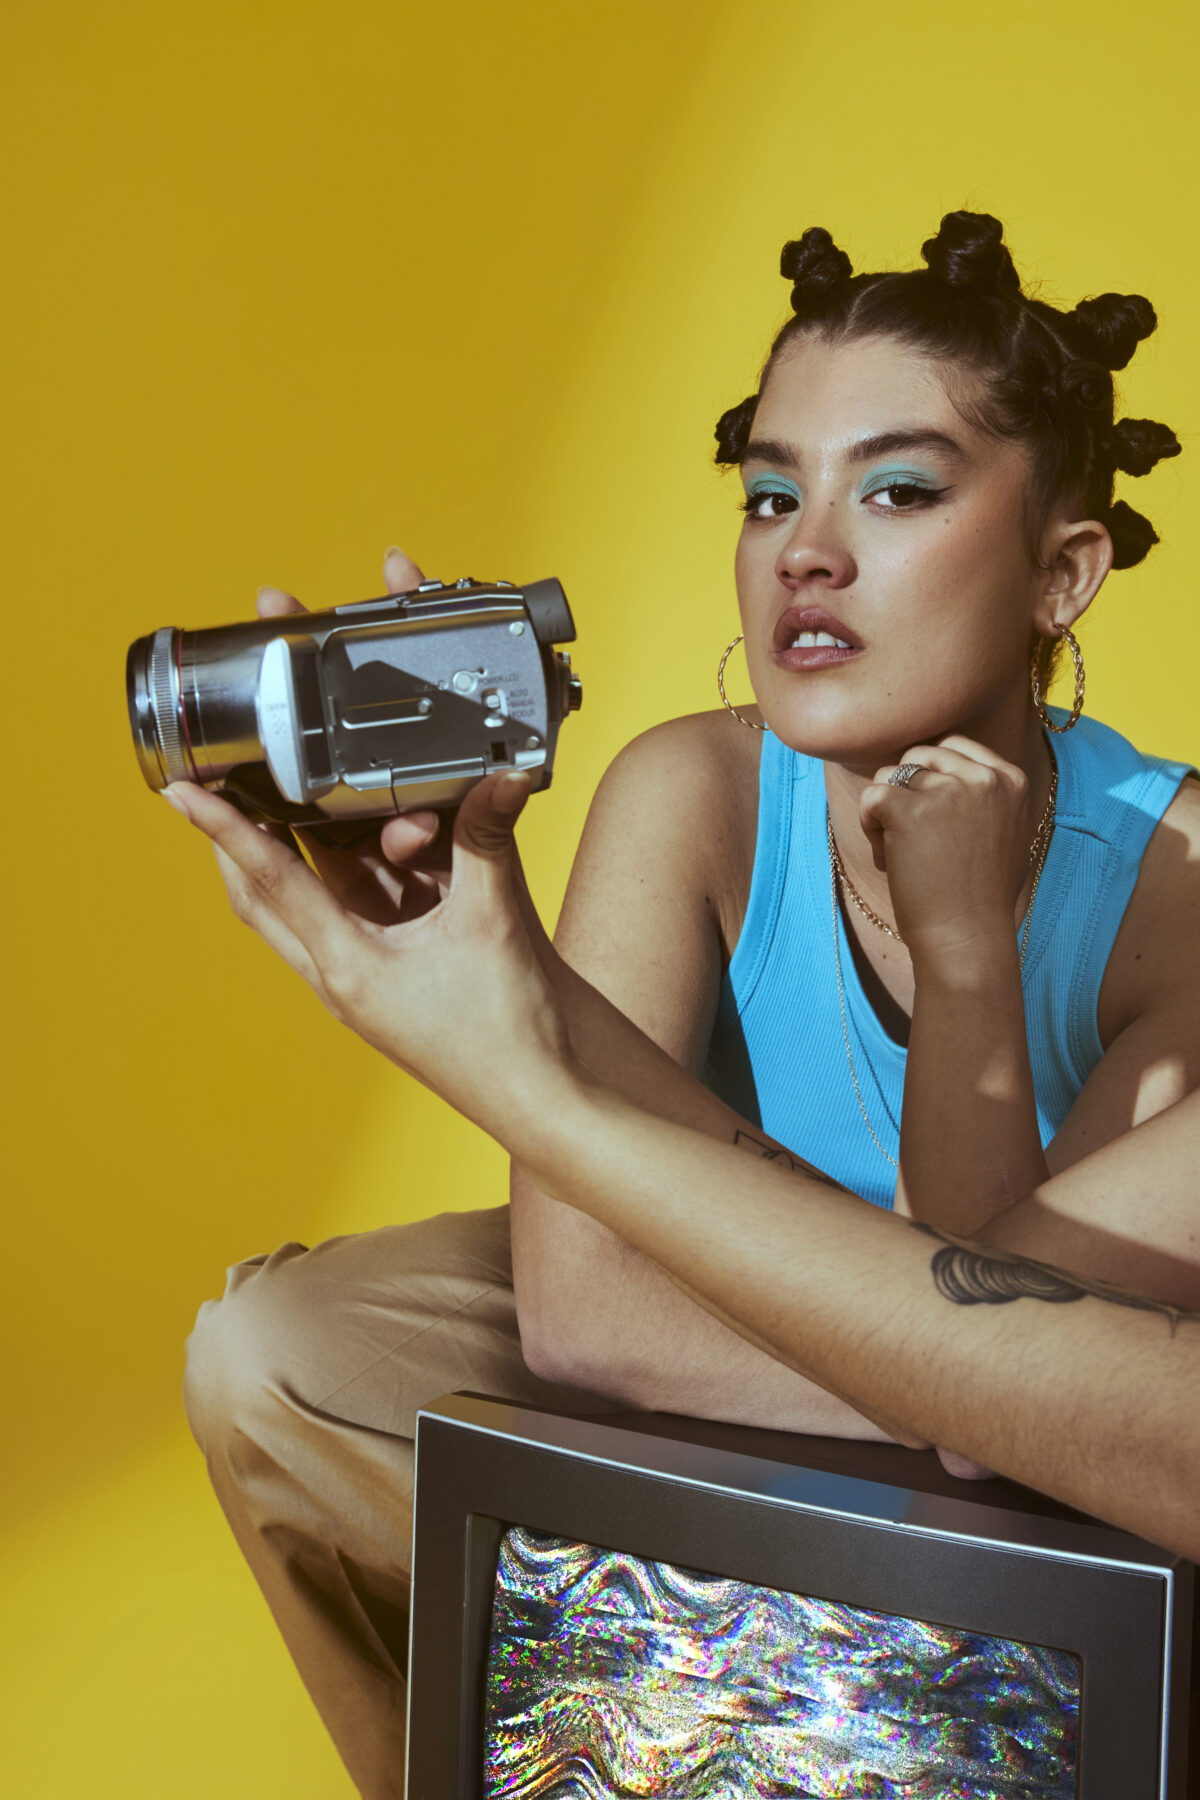
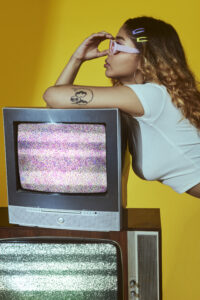
The use of color is one of the most powerful tools in branding. A consistent brand color palette helps create a recognizable visual identity. Your palette should include primary brand colors and complementary secondary tones that are used across all your photography.

  • Color Grading: The post-production process of altering or enhancing the color of an image is crucial. Will your images have a warm, golden-hour glow, or will they be cool and crisp? Will they be vibrant and saturated or soft and desaturated? This choice should reflect your brand’s personality. For example, a brand focused on natural, organic ingredients might use earthy tones and soft, natural light.
  • Backgrounds: The colors and textures of your backgrounds contribute significantly to the overall mood. Whether you use seamless paper backdrops, textured surfaces, or on-location settings, keep them consistent with your chosen palette.

Lighting and Mood

Lighting dictates the mood and emotional tone of a photograph. Your lighting setup should be consistent to ensure all your images feel like they belong to the same family.

  • Hard vs. Soft Light: Hard light creates sharp, defined shadows and a dramatic, high-contrast look, often used by high-fashion or edgy brands. Soft light, on the other hand, creates gentle shadows and a more flattering, ethereal feel, which is popular for skincare and natural makeup brands.
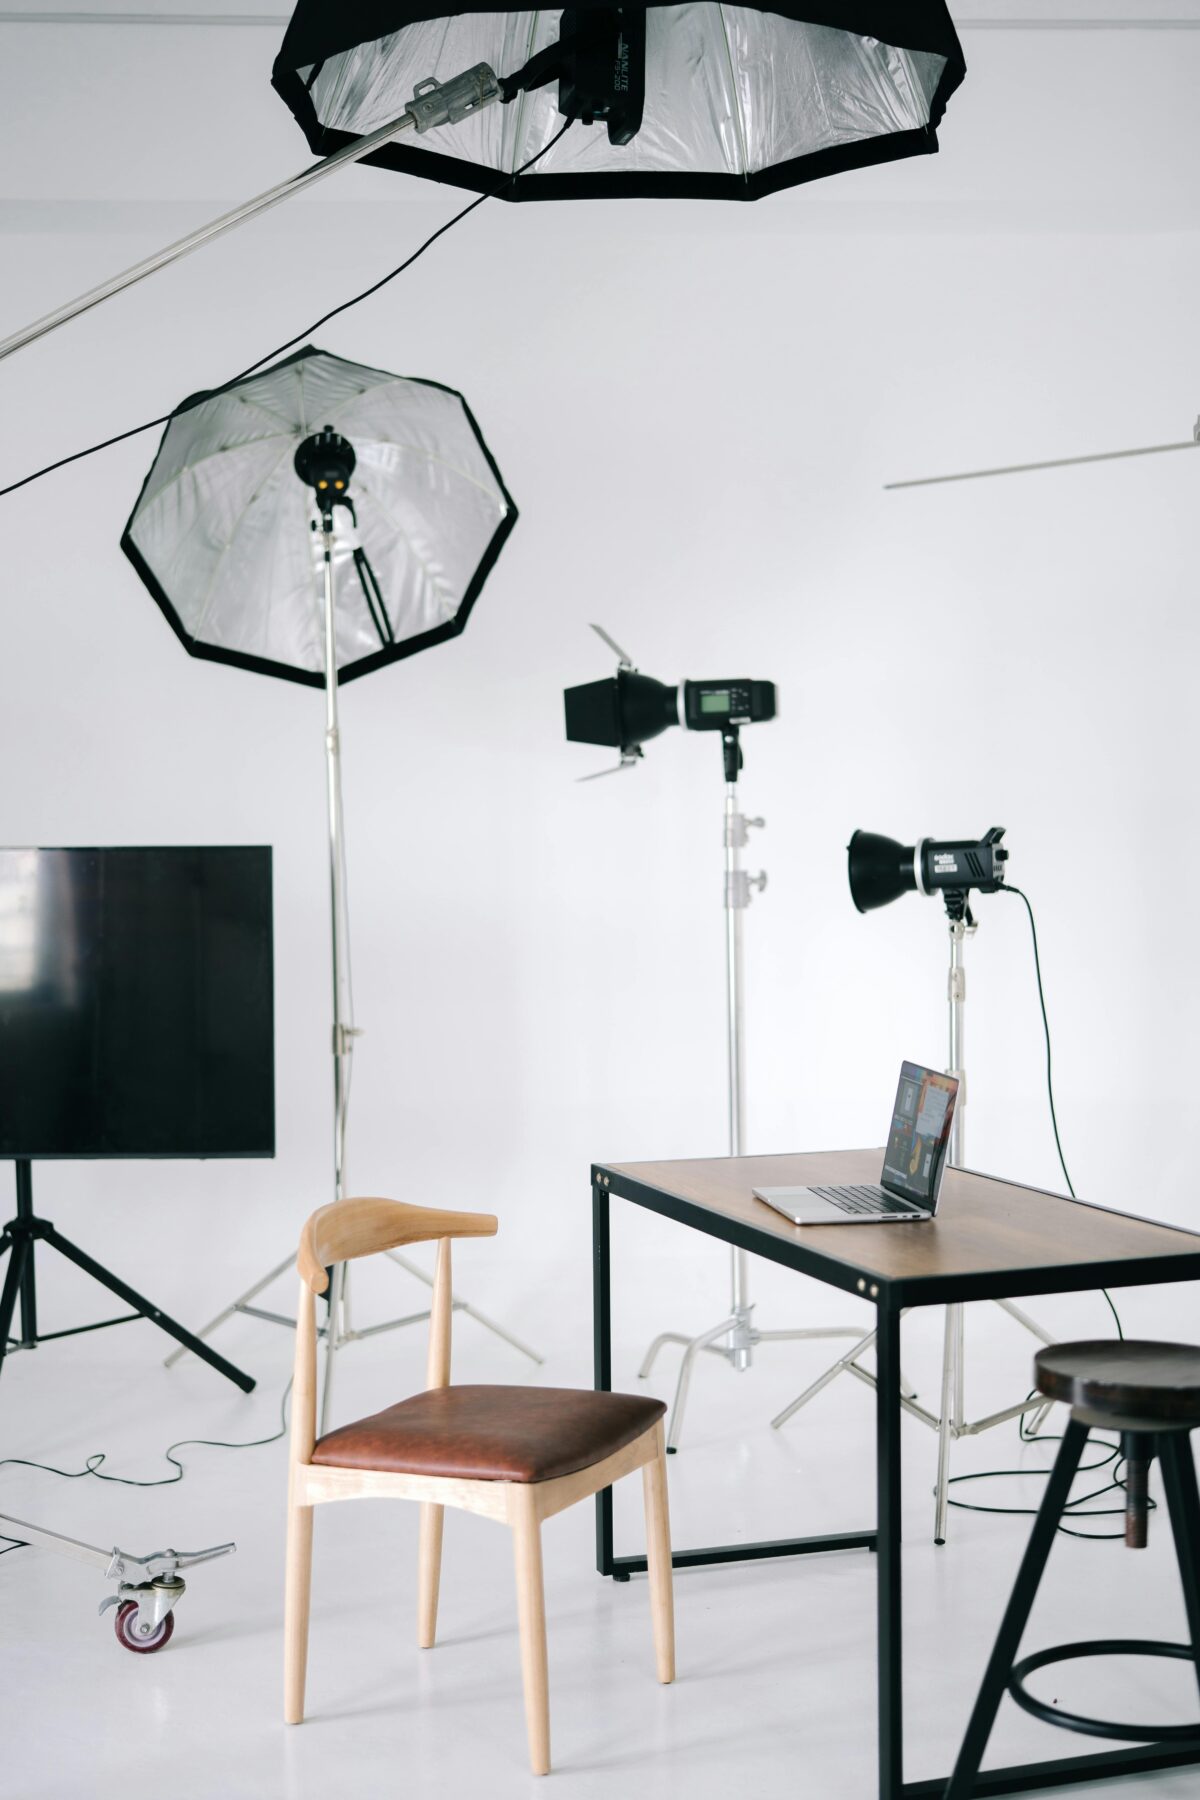
  • Lighting Setups: Decide on specific lighting configurations to use regularly. Documenting these setups helps ensure different photographers can replicate the look. Using a dedicated photography studio for rent with controlled lighting can simplify this process.

Model Selection and Styling

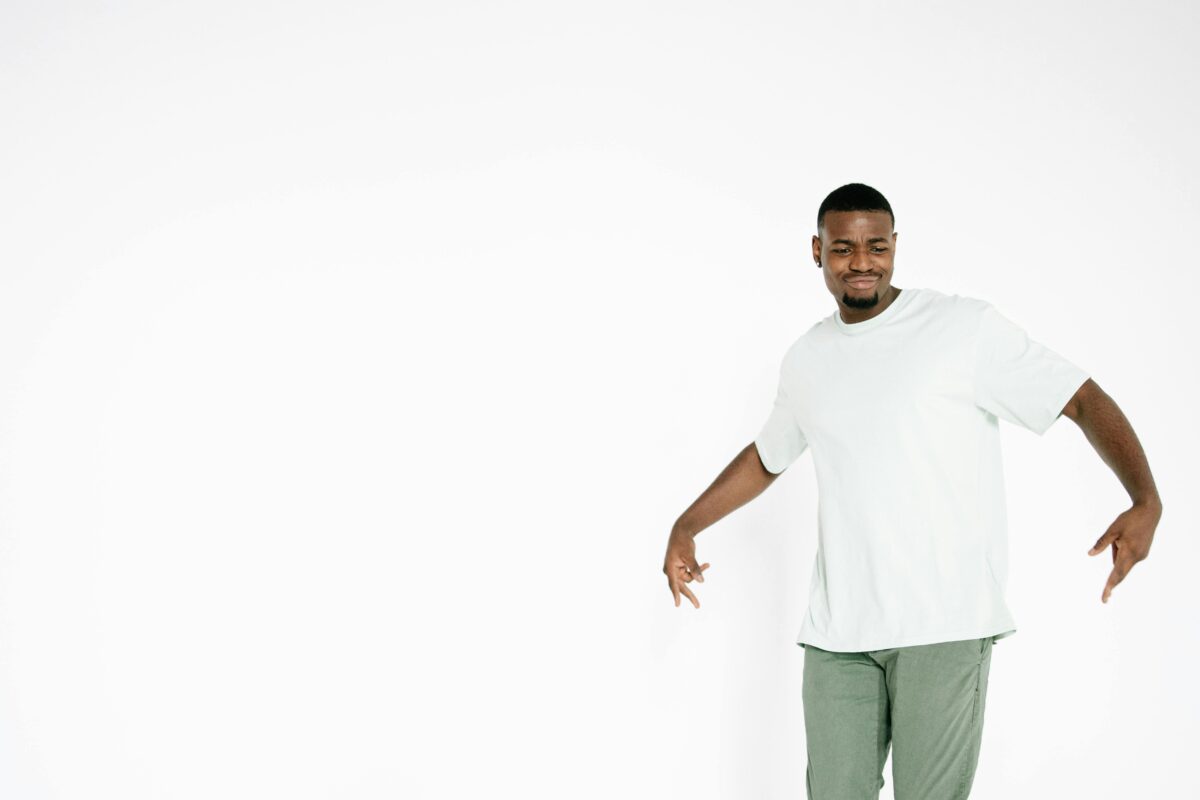
The models you choose are the face of your brand. Their look, expressions, and diversity should align with your target audience and brand values.

  • Casting: Develop clear casting guidelines. Are you looking for models with diverse skin tones, ages, and features? Does your brand champion a specific type of beauty, such as androgynous looks or freckled faces? Consistency in model selection reinforces your brand’s message of inclusivity and identity.
  • Makeup and Hair: Styling should be consistent and reflect the brand’s aesthetic. A minimalist brand might feature models with a “no-makeup” makeup look and natural hair, while a more glamorous brand would opt for bold makeup and elaborate hairstyles.
  • Wardrobe: Even if only a small part of the clothing is visible, it should be carefully chosen. Stick to a neutral color palette for wardrobe pieces to ensure the focus remains on the beauty aspect. Using professional beauty product styling techniques helps enhance product appeal in every shot.

Composition and Angles

Composition refers to the arrangement of elements within the frame. Consistent photography composition creates a sense of predictability and trust.

  • Framing: Decide on your preferred shot types. Will you focus on tight, detailed macro shots of lips and eyes, or will you use wider portraits? Establishing rules such as always shooting models from a slightly low angle or ensuring the product is always in the bottom-right third of the frame creates a cohesive visual flow.
  • Product Placement: When featuring products, their placement and interaction with the model should be consistent. Is the product held delicately, applied artfully, or simply placed next to the model

Tools and Tips for Maintaining Consistency

Create a Brand Style Guide

A comprehensive brand style guide is the single most important tool for maintaining visual consistency. This document should be the bible for your creative team, including photographers, retouchers, and graphic designers. It should detail:

  • Color Palette: Include HEX, CMYK, and RGB codes for your primary and secondary colors.
  • Lighting Diagrams: Provide examples and diagrams of your preferred lighting setups.
  • Model and Styling Guidelines: Outline your casting criteria, as well as makeup, hair, and wardrobe rules.
  • Composition Rules: Show examples of approved framing, angles, and product placement.
  • Post-Production Workflow: Detail the retouching process, including skin texture preferences (e.g., natural vs. airbrushed) and specific photo editing techniques or LUTs.

Use Consistent Equipment

While creativity shouldn’t be limited by gear, using a consistent set of equipment can help achieve a uniform look. Choosing dedicated rent space for photoshoot provides a controlled environment, making it easier to replicate setups and maintain a consistent visual style across all images.

  • Cameras and Lenses: Sticking to a specific camera brand or sensor size can help maintain consistency in color science and image quality. Using the same focal length lenses for similar shots (e.g., a 100mm macro for close-ups) also ensures a cohesive look.
  • Lighting Gear: Using the same type of lights (e.g., strobes or continuous LEDs) and modifiers (e.g., softboxes, beauty dishes) across shoots will help maintain a consistent quality of light.

Standardize Your Post-Production Process

A standardized post-production workflow is essential for consistency, especially when working with different retouchers.

  • Retouching Guidelines: Clearly define the level of retouching. Should skin retain its natural texture? Are blemishes to be removed completely? Providing clear before-and-after examples in your style guide is highly effective.
  • Retouching Guidelines: Clearly define the level of retouching. Should skin retain its natural texture? Are blemishes to be removed completely? Providing clear before-and-after examples in your style guide is highly effective.

To Wrap up

This effort ultimately pays off by helping you build a brand that’s not only visually stunning, but also instantly recognizable and trusted by your audience. Start shaping your brand’s visual blueprint today with Grattan Studios. We specialize in creating polished, cohesive beauty-product visuals through creative direction, photography services, and strategic design.

If you’re ready to bring your vision to life, reach out to us. We would love to hear about your goals and explore how we can support your next steps.

The Significance of AI in Professional Photography & Videography Production Services

Photography and videography are once again entering a new era of evolution through the rapid rise of Artificial Intelligence (AI) in the creative market. What began as a tool for automation has now changed into a creative partner, helping professionals capture, edit, and produce visual stories with greater efficiency and imagination. This technology not only organizes workflow but also develops imagination, enabling artists to focus more on storytelling while the AI handles the technical part. Therefore, to gain a better understanding of exactly how AI is significant to professional photography and videography production, and why it’s shaping the future of creative expression, let’s explore this blog.

AI in Professional Photography Production

Here are some of the most significant ways AI contributes to professional photography:

Intelligent Image Enhancement

AI-driven tools are not just for simple filters; they use deep learning algorithms to analyze lighting, tone, and texture in every frame. These systems automatically balance exposure, correct uneven lighting, and refine details to produce visually consistent results across entire photo sets. For commercial photographers, the use of AI in photography means quick delivery of high-quality, print-ready images without going through constant manual adjustments.

Automated Retouching

The software used in AI can precisely smooth out skin, remove imperfections, and adjust tones while preserving natural texture and depth. Using facial recognition and contextual analysis, AI-powered creativity tools can differentiate between skin, hair, and background, ensuring realistic edits at scale. This automation helps to improve workflow.

Smart Composition and Framing

AI now helps photographers perfect their shots by spotting symmetry, focus, and overall balance. Some modern cameras and AI photo editing software even give real-time framing tips, making it easier to capture well-composed, professional-looking photos on the spot. All of this helps reduce reshoots and ensures that each frame aligns with professional composition standards.

Background and Object Recognition

Through deep learning models, AI can automatically recognize subjects and separate them from backgrounds. This is useful for product, portrait, and fashion photography services, where precision cutouts or background replacements are frequently needed.

Predictive Editing and Curation

Thanks to machine learning, AI tools can now sort through large photo libraries and pick out the best images based on sharpness, emotion, and composition. This smart filtering saves time and helps photographers focus on creativity instead of constant reviewing.

AI in Professional Videography Production

Below, we have some of the most significant ways AI contributes to professional videography:

Automated Video Editing

Instead of spending hours trimming and arranging clips, creators can now rely on intelligent editing systems that identify emotional peaks, motion changes, and scene transitions to complete the stories. These AI video editing software tools intuitively determine pacing and rhythm, turning raw footage into engaging highlight reels or polished final cuts within a minute.

Smart Color Grading and Correction

By remembering the filmmaker’s favorite color style through studying previous videos or edits, AI tools can automatically apply those tones to entire sequences, in order to maintain visual consistency and increase aesthetic appeal.

Enhanced Visual Stabilization

Capturing steady footage no longer requires expensive gear, all thanks to AI. With the help of advanced stabilization tools, remove camera shake and vibrations in post-production without sacrificing image quality, delivering cinematic-level smoothness even from handheld or fast-moving shots.

Voice and Sound Optimization

Not only the visuals, but AI also improves the auditory experience. We can filter background noise, match sound levels, and even transcribe dialogue automatically. They can even identify overlapping audio frequencies, restoring clarity and focus to recordings that are made in busy environments.

Deepfake Prevention and Quality Restoration

Authenticity and quality assurance have become important in modern video production. AI in videography now detects visual manipulation and improves degraded footage by reconstructing missing details or boosting resolution.

What the Future Holds

The future of artificial intelligence in the media is both promising and evolving. Here are some key directions shaping the next phase of visual innovation:

AI-Generated Storyboarding and Script Assistance

Another major future trend is that creative AI tools will assist directors and photographers in conceptualizing visual sequences or scripts by generating scene layouts, lighting plans, or shot lists before production even begins. For instance, ChatGPT-powered script assistants can easily turn simple text prompts into detailed visual storyboards within minutes of asking.

Hyper-Realistic CGI and Scene Simulation

AI will make improvements in computer-generated imagery (CGI) by producing hyper-realistic environments, lighting effects, and motion simulations without the need for costly studio setups, improving previsualization and planning. It does this by using machine learning models that analyze real-world physics, materials, and lighting behavior to automatically generate realistic textures and movements that respond naturally to camera angles and motion.

Fully Autonomous Production Systems

The next frontier in AI-driven media will be the rise of fully autonomous production pipelines. Future AI systems will not only edit or assist but also manage entire end-to-end productions from conceptualization to lighting, directing, and final post-production. These systems will collaborate with human creators through natural language and visual prompts, automatically generating entire scenes and adjusting technical parameters in real time. This evolution will shift human roles toward high-level creative supervision, making a new era of self-directing, AI-orchestrated media creation.

Conclusion

By addressing the gap between technology and creativity, AI enables professionals to produce content that’s not only visually better but also crafted efficiently. And as this innovation continues to evolve, it’s set to change the standards of both photography and videography production, making the whole creative process faster, smarter, and more impactful than before.

Now, if you or someone around you is wondering where to use such innovations in life, well, your search ends at Grattan Studios. We provide professional-grade space, top-tier photo studio equipment, and expert support to make your next shoot perfect! Contact us at info@grattanstudios.com for more information.

How to Rent the Perfect Photo Studio For Social Media Content Creation

With social media constantly evolving, content creators need spaces that help them stand out and stay consistent, and renting a photo studio has become one of the most effective strategies to achieve that. As they work on different platforms like Instagram, TikTok, and YouTube, which thrive on fresh, engaging, and high-quality content, audiences subconsciously respond to the environments in which it’s produced. But finding such a space requires an understanding of the factors that support your creative process and make your shoots productive. So, what should you focus on to save time, effort, and money while making your content more impactful? Let’s find out in this blog.

Why Rent A Photo Studio For Content Creation?

  • Consistent Lighting and Environment – Studios provide controlled lighting and a stable environment, so you can produce content without worrying about changing weather, shadows, or outdoor noise.
  • Professional Equipment Access – You gain immediate access to high-quality cameras, lights, backdrops, and other gear without the cost of purchasing them yourself.
  • Creative Freedom – Multiple sets, backdrops, and props allow you to experiment with different styles and concepts, making your content attractive and unique.
  • Time Efficiency – Pre-equipped photo studio for content creators saves setup and teardown time. So it lets you focus entirely on creating content rather than preparing the space.
  • High-Quality Audio – Many studios have acoustic treatment, soundproofing, and audio equipment to ensure clean recordings for videos, voiceovers, or podcasts.
  • Professional Ambiance – A well-designed studio boosts creativity, keeps your team motivated, and premium look at your social media posts.
  • Privacy and Control – Studios provide a private environment where you can shoot uninterrupted, ideal for campaigns, confidential product launches, or influencer collaborations.
  • Consistency in Branding – With a studio space, you can maintain a consistent look and feel across all your content, strengthening brand identity.
  • Flexibility for Different Content Types – Be it photography and videography services, live streaming, or reels, studios can accommodate various formats efficiently.
  • Reduced Post-Production Hassle – Controlled settings minimize editing challenges, as lighting, backgrounds, and sound are already optimized.

Key Factors To Consider Before Renting A Photo Studio For Social Media Content Creation

Mastering the essentials of how to rent a photo studio ensures you choose the right space, equipment, and setup to showcase your creativity and elevate your content on social media. Check out these points:

Studio Size And Layout

When choosing a studio, think about how much space you’ll need for your content. A bigger photo studio makes it easier to set up multiple scenes, move your team around, and arrange props without feeling cramped. High ceilings let you place lights and backdrops without shadows getting in the way. Smooth floors are great if you’re filming movement-heavy content like dance or workouts. Studios with partitions or separate zones help create different backgrounds or quiet spots for recording voice-overs.

Lighting Options

Good lighting can completely change the quality of your content, so it’s worth paying close attention to. Look for studios with adjustable lights that can be softened or brightened to match the mood of your shoot. Daylight panels are excellent for natural-looking images, while continuous LED lights work well for video content, keeping brightness even across scenes. Also, check if the photo studio for content creators offers diffusers, reflectors, or color filters. These tools help reduce harsh shadows, create depth, and add creative effects that make your photos and reels amazing.

Backgrounds And Props

Check what types of backdrops are available: plain, textured, colored, or even specialty designs like brick or pastel panels. Having multiple options lets you create different looks without leaving the studio. Props can upgrade your visuals, so bring items that show your brand, such as furniture, plants, or branded merchandise. Some studios also allow hanging custom backdrops or using portable sets, which is great for seasonal campaigns, product launches, or unique video content. Thoughtful backgrounds and props save editing time and make your posts instantly engaging.

Equipment Availability

The type and quality of equipment a studio provides can significantly affect your workflow and the final outcome of your content. Apart from the basics like cameras and lights, check if the studio offers tripods, stabilizers, ring lights, or specialty lenses that can help you achieve professional-level shots without bringing all your gear. Some studios also provide advanced tools like green screens for creative editing, wireless audio systems for clear voiceovers, or studio monitors for precise color grading. Having ready access to high-quality photo studio equipment saves time, reduces setup hassle, and allows you to experiment with different filming techniques.

Acoustics And Sound Control

Clear audio is just as important as sharp visuals, especially for video content, tutorials, or podcasts. Studios with proper acoustic treatment, such as foam panels, bass traps, or soundproof walls, minimize echoes, background noise, and external disturbances. This ensures your voice recordings, interviews, or product demonstrations come out crisp and professional without the need for heavy post-production editing. Also, some studio rentals for photographers provide movable sound shields or portable vocal booths, giving you the flexibility to record in different zones without interference. Considering sound control upfront saves time, avoids costly re-recordings, and guarantees that your content maintains high-quality audio standards that your audience will appreciate.

Internet Connectivity

If your content creation involves live streaming, uploading high-resolution videos, or collaborating with remote team members, reliable internet is crucial. So, check whether the best photo studio rental platform provides high-speed, stable Wi-Fi, and whether there are enough network ports for wired connections if needed. Some studios even offer dedicated bandwidth for uninterrupted uploads, which is essential for time-sensitive campaigns or real-time audience engagement. Strong connectivity also allows you to quickly transfer files to cloud storage or send materials to editors, streamlining your workflow and ensuring that technical limitations don’t hold back your creativity.

Flexibility And Availability

Look for studios that offer flexible booking options, hourly, half-day, or full-day slots, so you can plan shoots around your team’s availability without being constrained. Some studios even allow last-minute bookings or extended hours for urgent projects, which is particularly helpful during product launches or seasonal campaigns. Confirming availability in advance also ensures you can reserve the specific equipment or creative studio spaces you need.

Conclusion

Remember, the key to a successful shoot lies in thoughtful preparation, open communication, and selecting a studio that aligns with your creative goals, technical needs, and budget. You can explore available options at Grattan Studio. Our photo studio rental New York city offers the best modern photography equipment in a contemporary space, all at a fair price. Contact us today for your next project!

Time Management Tips for Efficient Studio Photography Sessions

Efficient time management is the backbone of every successful studio photography session. In a space where every minute counts, from setting up lighting and arranging props to guiding models through poses, being organized can make the difference between a rushed shoot and a seamless, productive experience. Photographers who master the art of planning not only capture better images but also create a professional environment that clients appreciate. This guide talks about the practical strategies to help you optimize your workflow, minimize downtime, and make every session run like clockwork, so you can focus on what truly matters: capturing stunning photographs.

Why Time Management Matters in Studio Photography

Clients and models value a punctual and organized approach. When a session runs on schedule, it reflects professionalism and builds a reputation for reliability, essential traits for any studio photographer seeking repeat business or referrals.

A well-planned schedule also allows photographers to focus on creativity and lighting. Proper allocation of time ensures that different poses, angles, and lighting setups can be experimented with thoughtfully, without the pressure of a ticking clock. This is especially critical in studio photography, where lighting is key to mood, texture, and overall image quality. By managing time effectively, photographers can optimize both technical precision and artistic expression, producing high-quality results consistently.

Pre-Session Planning

Here is a list of steps for preparing for a photo shoot that you should keep in mind to avoid last-minute stress:

1. Define the Shoot Objective

Before the session, clearly outline the purpose of the shoot. A fashion editorial, product photography, or portrait session each requires a clear goal to determine the lighting, props, and poses needed. This focused approach prevents unnecessary trial and error during the session.

2. Create a Shot List

A detailed shot list acts as a roadmap for the session. Break down each required shot with notes on angles and photography equipment setup. By following a structured plan, you can ensure no essential shots are missed and reduce downtime between setups.

3. Prepare Equipment in Advance

Check all your cameras, lenses, lighting gear, and accessories beforehand. If you’re working in a photoshoot rental space, familiarize yourself with the studio layout and available equipment to prevent delays during the session. Fully charge batteries, format memory cards, and have backup equipment ready. Having everything prepared prevents interruptions that can derail the schedule.

4. Scout and Arrange Props and Outfits

Organize all props, outfits, and backgrounds before the shoot. Lay them out in a logical order to minimize time spent searching during the session. For multi-outfit shoots, plan the sequence to reduce wardrobe changes that may slow down the workflow.

5. Communicate with Your Team

Before the session starts, take a few minutes to review your photography session planning with assistants, stylists, or makeup artists. Make sure everyone knows their role, responsibilities, and the timing for each task. Clear communication keeps everyone on the same page and helps the shoot run smoothly, so you don’t waste time figuring things out during the session.

Streamlining the Shooting Process

Once the session begins, efficiency depends on clear coordination and a structured workflow. Following a pre-shoot checklist helps photographers confirm that models, props, wardrobe, and lighting are ready before starting, allowing poses and expressions to be executed quickly and the studio to remain organized throughout the session.

1. Optimize Lighting Setups

Lighting adjustments are often the most time-consuming part of studio shoots. Familiarize yourself with your equipment and plan versatile setups that can accommodate multiple shots.

2. Limit Distractions

Keep the studio organized and limit unnecessary interruptions. Avoid unnecessary phone calls, social media, or unrelated conversations that can break concentration. A focused environment ensures more productive shooting and better energy for everyone involved.

3. Batch Similar Shots

Group similar poses, outfits, or lighting conditions together. For instance, complete all shots with one background or photo studio equipment setup before moving on to the next. This approach reduces the time spent readjusting gear and minimizes repetitive setup.

4. Use a Timer or Schedule

Allocate specific time blocks for different parts of the session, such as portrait shots, product shots, or candid moments. Use a timer to stay on track while maintaining flexibility for creative exploration. This structured approach ensures all planned shots are completed efficiently.

Post-Session Wrap-Up

Efficient post-session practices includes:

1. Immediate Backup and Organization

Back up all images immediately after the session. Organize files into folders labeled by date, client, and shot type. This prevents confusion and saves time during editing.

2. Quick Review

Conduct a preliminary review of the images to ensure key shots are captured. Identifying missing shots early allows for minor reshoots if necessary, saving time in post-production.

3. Streamlined Editing Workflow

Establish a standardized editing workflow. Use presets, batch editing, and automation tools where possible. A structured editing approach reduces time spent on repetitive tasks, maintaining consistency in style and quality.

4. Feedback and Client Communication

Send client previews promptly with clear instructions for feedback. Efficient communication ensures faster approvals and minimizes back-and-forth delays, keeping projects on schedule.

Smart Tools to Save Time

1. Studio Management Software

Platforms like Studio Ninja or Táve help schedule sessions, manage client information, and track workflow. These tools streamline administrative tasks, freeing up more time for shooting.

2. Lighting Control Apps

Adjusting lights no longer requires moving around the studio. Many modern lighting systems link to tablets or smartphones, which allows photographers to change settings instantly and save time between setups.

3. Tethered Shooting

Connecting the camera to a computer for real-time preview allows instant review of images. This reduces unnecessary retakes and ensures immediate feedback on composition, focus, and exposure.

4. Automated Backdrops and Props

Motorized backdrops and props can save significant time during scene transitions. Quick adjustments with minimal manual handling streamline the shooting process, especially in commercial or product photography services.

5. Post-Processing Plugins

Editing photos does not have to take too much time. Tools like Lightroom and Photoshop offer presets and plugins that handle repetitive tasks, and batch processing or AI enhancements help complete edits faster without losing quality.

Conclusion

By implementing these tips, photographers can increase productivity and focus more on their creative vision. Time management not only improves workflow but also increases the quality of work and client satisfaction. If you want professional help, Grattan Studio offers both photography and videography services, aiming to capture genuine emotions and immortalize fleeting moments. Contact us For any additional query.

How To Guide Non-Professional Models For Confident, Natural-Looking Photos

Capturing authentic, natural-looking portraits demands the ability to connect, guide, and empower your subject, especially when working with non-professional models. Unlike seasoned professionals, first-time or amateur models often lack experience with posing, managing expressions, and feeling at ease in front of the camera. As a photographer, your role extends beyond directing; you become a coach, collaborator, and confidence-builder.

To help you successfully play all these roles, this guide provides practical strategies about how to guide models during a photoshoot to make them feel comfortable, confident, and expressive in front of the camera. Without any delay, let’s get straight into it.

Proven Tips to Direct Non-Professional Models

The following tips cover everything from pre-shoot preparation to techniques during the session to achieve stunning results

Build Trust with Clear Communication Before the Shoot

Before the day of the shoot, establish an open line of pre-shoot communication with models. When people feel heard and understood, they’re more likely to trust you and, in turn, relax during the session.

How to build trust with your model before the shoot:

  • Discuss expectations early: Share the vision, goals, and mood board for the shoot. Clearly explain what types of shots you’re aiming for (e.g., candid, editorial, lifestyle).
  • Answer all logistical questions: Non-professional models may feel unsure about what to bring or wear. Provide a prep guide with wardrobe suggestions, grooming tips, and arrival details.
  • Provide visual references: Show examples of poses or expressions that fit the theme. This helps eliminate uncertainty and creates a shared mental picture.
  • Encourage a two-way dialogue: Invite the model to share their ideas or comfort zones. This collaboration enhances authenticity and boosts their confidence
  • Send a pre-shoot checklist: Include reminders on hydration, rest, clothing, skincare, and nails. Small prep tips help models feel physically and mentally ready.

Set Up a Comfortable Environment That Supports Relaxation

Tips for creating a positive environment:

  • Select a familiar or low-pressure location: Choose a setting where the model feels safe and comfortable, such as their home, a quiet outdoor space, or a comfortable setup at a photo studio New York. Familiar environments reduce anxiety and allow for more natural expressions.
  • Use mood-enhancing music: Soft, instrumental, or genre-appropriate playlists can significantly ease tension. Let the model suggest tracks they enjoy to personalize the session.
  • Limit on-set personnel: Keep the crew minimal, ideally just the photographer, assistant, and stylist if needed. Fewer eyes mean less pressure, especially for sensitive or emotive shoots.
  • Begin with casual warm-up shots: Start with easy, non-posed images to help the model acclimate to the camera. Allow them to move freely and explore expressions without placing high expectations on them.
  • Create a non-judgmental, affirming atmosphere: Offer genuine encouragement and avoid over-correcting early on. Positive reinforcement helps build confidence and rapport.
  • Provide breaks and hydration: Regular short breaks and offering water or snacks demonstrates care and helps the model maintain energy and comfort throughout the session.

Use Gentle Prompts to Guide Natural Body Movement

Rather than instructing non-professional models to strike formal poses, which often results in stiffness, use intuitive prompts that encourage natural gestures and emotion. These cues allow for candid images and a more relaxed subject.

Some prompts to try:

  • Walk slowly towards me and look over your shoulder.
  • Pretend you’re reaching for something on a shelf.
  • Turn slightly to the left and look at the horizon.
  • Think of a funny story and giggle to yourself.

Note: Often, the most compelling frames emerge during transitions, between prompts, while adjusting posture, or in response to a suggestion. Keep shooting throughout.

Review Photos Mid-Shoot to Reinforce Progress and Adjust

Sharing progress shots during the session can provide your model with the reassurance they need. Showing the model how they appear on camera offers a valuable perspective and can be a powerful tool for learning how to improve poses mid-session.

Benefits of reviewing mid-shoot images:

  • Reinforces confidence and self-assurance: Sharing standout frames mid-session validates the model’s efforts and helps them recognize their strengths. This instant positive reinforcement boosts morale and encourages continued authenticity
  • Facilitates visual feedback and real-time adjustments: Rather than abstract instructions, use images to show subtle improvements in posture, expression, or body angles. Visual references are easier to understand and more effective than verbal cues alone.
  • Promotes creative collaboration: Invite the model to share their thoughts on what feels natural or what they’d like to explore further. This translates from one-way direction to a shared creative process. This approach encourages shared authorship of the shoot, making the model an active creative partner.
  • Keep feedback positive and purpose-driven: Keep the feedback constructive and light e.g., “This is great—let’s see what happens if we lift the chin slightly for more light.” Maintaining an uplifting tone preserves momentum and motivation.

To wrap up:

Working with non-professional models calls for patience, clear direction, and plenty of encouragement. With these strategies in hand, you’ll not only capture stunning images but also create a memorable, positive experience your model will carry with them long after the session ends.

At Grattan Studios, we specialize in working with individuals of all experience levels, helping them feel confident and camera-ready from the very first frame. You can book us for portrait sessions, brand content, or commercial visuals. Our expert photography and videography services are designed to bring out the best in every subject, professional or not. Reach out to us at 347‑372‑3915 or email us at info@grattanstudios.com to book your session.

Finding the Best Photo Studio for Your Next Shoot: Expert Guide for Photographers

Planning your next photoshoot can be exciting, but also a bit daunting with so many studio options available. The right space plays a crucial role in bringing your creative vision to life, influencing everything from lighting and mood to workflow and comfort. Choosing a photo studio isn’t just about aesthetics; it’s about finding a space that supports your style, equipment needs, and budget. Photographers need to think about factors like studio size, lighting gear, accessibility, and even available amenities.

In this expert guide, we’ll break down everything on how to choose a photography studio to ensure your next shoot runs smoothly and professionally. Let’s explore how to do just that.

Define Your Creative and Practical Requirements First

Before you even start Googling studios or asking for referrals, take a moment to get clear on what you actually need. Ask yourself:

  • What’s the goal of the shoot? (e.g., LinkedIn headshot, product ad, family portrait)
  • How many people are involved?
  • Do you want indoor, outdoor, or both?
  • Are you looking for candid shots, posed, or documentary style?

Writing down your requirements helps you filter studios that can truly meet your needs instead of just going with whoever looks flashy on Instagram. According to a 2023 client feedback study by Format Magazine, photographers who outlined clear creative goals before contacting studios were 27% more satisfied with their results.

Set a Realistic Budget and Understand What’s Included

A studio rental pricing guide is essential for making a smart choice, especially when considering photo studio rental Brooklyn. Always ask what’s included, such as hourly limits, lighting gear, backdrops, and modifiers. Also, check whether extras like Wi-Fi, parking, or air conditioning are covered or charged separately.

Keep in mind that prices often vary based on location and size, with central or larger studios—such as those found in Brooklyn—typically costing more. Conducting some research upfront helps you avoid hidden fees and find a space that suits both your needs and budget. Whether you’re booking a photo studio rental in Brooklyn for a single day or a longer term, understanding all the inclusions can save you time and money.

Confirm Studio Availability and Scheduling Flexibility

Before finalizing a booking, please verify that your preferred date and time are available. Many popular studios book in advance, especially during busy seasons, and often rent by the hour or in half-day blocks. It’s also helpful to ask about flexibility, can your booking be adjusted if your plans change?
Some studios charge for overtime or allow only limited grace periods, while others may have firm cancellation rules. Understanding these details early on helps you plan with confidence and keeps your shoot running smoothly.

Do Your Homework: Reviews, Ratings, and Referrals

A smart first step is to check reviews, ratings, and referrals to get an idea about a particular service’s reputation. Platforms like Google, Yelp, and social media offer genuine feedback from photographers who have used the space. Look for consistent comments on cleanliness, lighting quality, and professionalism.
Referrals from fellow photographers are especially helpful, as they often share practical details you won’t find online, setting a realistic expectation of the studio.

Visit the Studio or Request a Virtual Walkthrough

Every studio will showcase its best shots on its website or Instagram. That’s great, but don’t stop there. Visit the studio personally. Walking through the space gives you a firsthand sense of the ceiling height, background options, and how the layout aligns with your shooting style.

Suppose the studio isn’t nearby; a virtual tour can be a helpful alternative. Many studios offer simple video walkthroughs, allowing you to see the space clearly, ask questions, and view sample photos from past sessions to see how the studio performs under different lighting setups.

Evaluate Studio Amenities That Could Enhance Your Workflow

A survey by StudioBinder found that 60% of creative professionals cited photo studio equipment and support as a top factor in choosing a space for shoots. These extras might seem minor at first glance, but they can cut down time, improve quality, and reduce stress, especially for team shoots or content production days. So, if you’re doing a more complex shoot, say for branding, fashion, or product work, the amenities a studio offers can seriously impact your efficiency and output. Look for extras like:

  • A makeup and styling area
  • Changing rooms or wardrobe racks
  • Wi-Fi for live previews or remote collaboration
  • Tethered shooting setups (for instant image review)
  • On-site equipment rentals (lighting, backdrops, props)

Understand the Studio’s Cancellation and Rescheduling Policy

Before booking, review its cancellation and rescheduling policies. Most require 24–72 hours’ notice to avoid fees or losing your deposit. Short notice may result in partial charges, especially during busy periods. Some studios offer flexibility and allow free rescheduling if notice is given in advance, while others may be less accommodating.

Consider Accessibility and Location Convenience

Accessible studio locations can make a big difference when searching for a place. It must be easily accessible by car or public transport to help everyone arrive on time. Nearby parking and elevator access simplify loading gear. Being mindful of local traffic patterns or having a few alternate routes in mind can also help things run more smoothly. Features like ramps or wide doorways are essential if any team members or clients have mobility issues.

Ask About Insurance and Liability Policies

Knowing the type of insurance a studio offers is crucial in the event of damage or injury, as it helps avoid confusion later. Some offer their insurance, whereas others require you to provide proof of coverage.
Be sure to clarify if equipment is included and understand liability terms to protect both you and the studio in high-risk shoots.

Look Into On-Site Support and Technical Assistance

Certain photography and videography services have in-house technicians who offer support with lighting setup, camera and equipment troubleshooting, backdrop arrangements, and even sound and audio assistance. Others may provide help only upon request, so it’s a good idea to check in advance what kind of support is available.

Conclusion

Now that you have these studio selection tips, take the time to give careful consideration to choosing the best option. In case you are looking for a thoughtfully designed studio in Brooklyn, Grattan Studio is worth considering. This is a female-owned photo studio in East Williamsburg, Brooklyn, New York, offering the best of modern photography equipment in a contemporary space surrounded by bustling Brooklyn culture, all at a fair price.

How to Maximize Your Photo Studio Rental: A Photographer’s Guide

Too many photographers either underutilize their studio time or end up going over budget in the whole process. Are you one of them? If yes, we understand that owing to the unfamiliarity with the equipment, poor planning, and lack of preparation, one can easily turn a well-planned shoot into a chaotic and costly experience.”

As renowned photographer Annie Leibovitz once said, “When you’re in a studio, you don’t want to be` figuring things out, you want to be creating.”

Hence, this guide helps photographers make the most productive and cost-effective use of their rented studio by offering smart strategies for preparing, shooting, and wrapping up efficiently, because choosing the right studio rental is the ultimate mission.

Professional Tips to Maximize Your Photo Studio Rentals Investment

Here are some pro tips to maximize your photo studio rental investment to make every step of your process count

Define Your Goals and Visual Plan Before the Shoot

Don’t start without a clear vision in mind; whatever you’re shooting, whether it’s fashion, products, or promotional content, clarity is everything. Clearly explain everything to your team and models, and communicate your goals to them effectively. Start by creating a sketch or a mood board to help you visualize your idea. This will help you save time, which is a priority during rentals, and also ensures a smooth shoot.

Choose a Studio That Matches Your Shooting Needs

Consider a studio that aligns perfectly with your requirements, and always opt for those where the lighting setups, such as natural light or artificial light, backgrounds, props, and space requirements (for full-body shots or product tables) are suitable. Check for Accessibility features like parking, elevators, and changing rooms. It doesn’t matter if you’re seeking a photography studio for rent or already have one booked; these choices will impact your session outcome. This makes your work much easier as you’ll have the space ready beforehand and won’t have to worry about it after moving in.

Schedule Smart and Arrive Early to Avoid Time Pressures

Time in a rented studio is generally limited and paid by the hour, so arriving before the required time (if the studio allows) gives you the advantage of getting familiar with the space and settling mentally in an unfamiliar environment where you have never worked before. Studio rental scheduling tips can be vital in this regard. Opt for time slots that allow flexibility and buffer for setup or delays. And, schedule your shoots smartly to avoid any last-minute time-related issues. You will need sufficient time for product checks, model preparation, and more. Many studios offer half-day or full-day rentals; choose the option that best suits your budget and workload.

Prepare Gear and Essentials in Advance

Always prepare your gear and amenities in advance. Follow the process of Prepare, Check, Test, and Pack to avoid any technical issues. It includes essentials such as Camera lenses, Creative Props, Lighting Stands, Chargers, Tripods, Cleaning Kits, and Cables, among others. Carry backup amenities like extra batteries, memory cards, and a secondary light source in case of unexpected failures. Bring compact and multi-purpose gear to reduce clutter in the studio. Having access to reliable Photo Studio Equipment in-house or bringing your own can help you stay ready for any technical challenge.

Use Studio Amenities

Many modern studios offer valuable in-house amenities, including professional lighting technicians who can assist in achieving the ideal lighting setup, high-speed internet for uploading files, basic furnishings like chairs, tables, and backdrops, wardrobe and changing rooms for model prep, a mini refrigerator to store refreshments during long shoots, and covered parking for easy loading and unloading of gear. Making use of the studio equipment not only saves time but ensures that you are using equipment that is compatible with the studio environment, making your shoot easy and smooth.

Keep the Space Tidy

Keep the space tidy and clean as it showcases professional conduct. Always organize cables, props, and gear during the session, not just after it ends. It will not only de-clutter the space but also reduce the risk of damage to the equipment.

Network with Studio Staff

Studio staff can be a valuable asset during the process; they often possess important knowledge about lighting setups, optimal backdrops, or hidden equipment that may not be advertised. If something isn’t working, they’re usually the first ones to help. Always be polite, professional, and appreciative with them.

Use Zones for Specific Purposes

While shooting in a larger area, dividing the space into clearly defined zones can significantly enhance workflow, reduce chaos, and keep your team focused and organized. For instance,

  • Shooting Zone: Where the main camera work and lighting setups will take place.
  • Prep Zone: Having a proper space for models or clients to get ready, do their makeup, hair, wardrobe changes, etc.
  • Gear Zone: A designated area to store extra lenses, batteries, modifiers, and props. By keeping all your tools in one place minimize searching time mid-shoot.
  • Review Zone (if applicable): A spot with a laptop or monitor for instantly checking shots and managing files.

Review Your Session and Improve for Next Time

After the shoot, always review your progress and identify areas for improvement. Self-assess your work and identify where you excelled or where you need improvement. This is key to understanding how to learn from photo studio sessions and continuously level up your performance with each project.

Also, take the time to evaluate aspects such as time management, client satisfaction, the use of props and gear, and how effectively your team delivered your Photography and Videography Services during the session.

Conclusion

So, there we have all the tips one needs to practice for maximizing their photo studio rental. Remember, whether you’re a beginner or a professional photographer, every shoot in a rented space is an opportunity to sharpen your skills, streamline your process, and achieve better outcomes for you and your clients. In case you are looking for professional studios? Your search ends at Grattan Studios! Visit us to get professional-grade space, equipment, and support, perfect for taking your next shoot to the next level.

How To Use Both Sunlight And Studio Light Effectively In A Studio Setup

You’re all set to film, camera ready, script rehearsed, but your lighting just won’t cooperate. Either sunlight keeps shifting, or your studio lights cast harsh shadows. It’s a common issue that can make even a well-planned shoot frustrating and unproductive. But with the right knowledge of how to combine natural and studio lighting effectively, you can overcome these challenges, no matter the weather, time of day, equipment limitations, budget, or shooting environment. But how do you actually make sunlight vs studio lighting work?

In this blog, we’ll walk you through beginner-friendly techniques to help you build a lighting setup that works with your environment, not against it. Let’s get into it.

Practical Tips To Use Sunlight And Artificial Light In A Studio Setup

How to Use Natural Light in a Studio Setup

Mastering studio lighting techniques with sunlight starts with understanding how natural light behaves indoors and how to work with its direction and intensity.

Use North-Facing Windows For Stable Light

In a studio, place your shooting area near a north-facing window to benefit from soft, indirect daylight that doesn’t shift dramatically throughout the day. This setup helps maintain consistent exposure and reduces the need for frequent lighting adjustments, especially during long shoots.

Diffuse Harsh Sunlight With Sheer Curtains

If your studio has windows that get direct sunlight, hang sheer white curtains or use lightweight diffusion fabric on a frame. This softens intense beams, reducing strong shadows and highlights on your subject, allowing for more even skin tones and surface textures in photos or videos.

Plan Shoots Around Sun Movement

Use apps like Sun Seeker or Helios to track the sun’s position relative to your studio windows. Schedule your sessions during the time of day when the light naturally enters your space at the desired angle and intensity, such as early morning for side light or late afternoon for warmer tones.

Bounce Light Using Foam Boards Or Reflectors

In studio setups where one side is heavily lit by sunlight, place a white foam board or a reflector on the opposite side of the subject. This helps fill in shadows and balances the lighting, especially when shooting portraits or small product scenes near a sunlit window.

Take Advantage Of Floor Or Window Light Spill For Accent Shots

When sunlight hits the floor or a wall at an angle, use that spill as a creative accent. Set props or textures in those lit zones to highlight them naturally without additional lights. This works well for product flat lays or lifestyle detail shots in daylight setups.

Use Sunlight To Create Natural Patterns

In your studio, position your subject or background near textured glass, blinds, or plants to let natural light cast patterned shadows. This adds artistic layers to the shot without requiring extra gear or editing, giving your content an organic, high-end feel.

How To Use Artificial Light In A Studio Setup

Match Lights To The Desired Color Temperature

Choose lights with the correct color temperature based on your theme. For example, use 5600K LED panels to mimic daylight for clean, neutral tones, or switch to 3200K bulbs for a warmer look. Set your camera’s white balance accordingly for accurate color rendering.

Use Barn Doors, Grids, Or Snoots For Beam Control

Mount your photo studio equipment, such as lights with modifiers like barn doors, grids, or snoots, when you want to narrow the light beam or control the spill. This setup helps highlight only the subject while keeping the background dim, making it ideal for dramatic portraits or product isolation shots.

Layer Multiple Light Sources For Creative Depth

Build your lighting setup with a key light as the primary source, a fill light to soften shadows, a backlight for separation, and optional background lights for dimension. Each light should be placed at different heights and angles to create a dynamic, professional-looking result.

Modify Light Intensity With ND Gels Or Dimmers

Use lights with built-in dimmers, or apply neutral density gels to reduce brightness without changing color temperature. This helps you fine-tune the exposure in your studio without repositioning lights, especially useful in small spaces where movement is restricted.

Mount Lights On Ceiling Rails Or C-Stands For Flexibility

Mounting lights on ceiling rails or heavy-duty C-stands allows you to angle them freely without blocking movement or cluttering the floor. This is particularly helpful in small studios or when working across multiple sets. It also offers the flexibility needed to quickly adapt to the challenges of studio and natural light, such as shifting sunlight or the need to rebalance exposure throughout the day.

Utilize Flicker-Free Lights For Video Shoots

If your studio work includes video, make sure to use flicker-free continuous lighting designed for high frame-rate recording. This is especially important when using sunlight and studio light together, as it helps prevent exposure inconsistencies, banding, or flickering, crucial for smooth results in slow-motion or 60fps shoots.

Studio Lighting Adjustment Challenges And How To Overcome Them

Lighting Challenge How to Overcome It
Skin tones appear inconsistent across different shots, making post-editing harder. Use a gray card at the start of each session to set a custom white balance. This keeps skin tones and colors consistent, crucial for professional photography services that require minimal editing.
Glossy or metallic surfaces reflect harsh light, hiding textures or details. Use a light tent or a diffusion scrim between the light and the subject. This softens reflections without dulling the subject’s surface.
Strong shadows appear behind the subject due to a single light source. Add a second low-power background or rim light to gently fill in those shadows and keep the background clean.
Light spills into areas of the frame that you want to keep dark or neutral. Block extra light using black foam boards or flags, which act as barriers to contain the beam only where needed.
Flat lay or top-down shots have uneven lighting, especially near the edges. Use a large overhead softbox or multiple lights spaced evenly above the setup to ensure full, uniform coverage.
The subject accidentally moves out of the lit area, causing underexposure. Mark floor spots with tape so the subject stays within the light zone. Widen the beam slightly if more movement is needed.

Conclusion

By following the tips above, you can effectively balance natural sunlight and studio lighting to achieve your ideal look. However, if your current location doesn’t offer the flexibility or control you need, consider booking Grattan Studio, a leading photography studio in NYC. We provide a wide range of photo equipment, including with every studio rental, ensuring you have everything needed for a successful shoot. So, reach out to us today to get started!

A Complete Guide To Negative Space In Studio Photography

Ever looked at a photo and felt like the “empty” space somehow said more than the subject itself? That’s the magic of negative space. It refers to the open or unoccupied areas around the main subject of an image. While it might appear unused, it actually serves a crucial role in composition—guiding the viewer’s attention, creating visual balance, and emphasizing the subject with intention and clarity. When used thoughtfully, this space can also be a tool for mood, storytelling, or showcasing the subject’s shape and form.

Wondering how to apply it in your own work? You’re in the right spot. This guide will walk you through how to make negative space a powerful tool in your studio shots. Let’s dive in!

Techniques to Use Negative Space Effectively in the Studio 

Background Selection & Setup

  • Choose uniform backgrounds (white, black, neutral gray, or bold solids) with minimal texture to maintain focus on the subject. 
  • Make sure the backdrop covers at least 50% of the frame around your subject to establish substantial negative space. 
  • Keep the background depth shallow and free from clutter to prevent competing visual elements .

Precision Lighting Techniques

  • Use soft, diffused key lighting (softboxes or large umbrellas) to create seamless tonal transition between subject and background. 
  • Apply key lighting techniques for negative space with 1:1–2:1 ratios on white backgrounds for bright, clean imagery, or low-key setups on dark backgrounds (ratios of up to 8:1) to deepen the negative space.
  • Integrate a rim/backlight at ~45° behind your subject, ~1 stop brighter than the key, to carve separation and dimensionality.
  • Measure light precisely: use a light meter to achieve consistent 2:1 or 3:1 key-to-fill ratios, with variations below ±0.3 stops across the frame.

Deliberate Subject Placement

  • Position the subject using the Rule of Thirds, Golden Ratio, or Rule of Space.
  • Maintain generous spacing in the subject’s facing direction to imply motion, narrative, or tension.
  • Avoid edge proximity that creates visual “cramping” ensure negative space feels intentional, not accidental

Scale, Perspective & Depth Management

  • Vary the subject size relative to the frame.  Small subjects in large negative space evoke a sense of isolation; large ones promote intimacy.
  • Shift camera angles lower for imposing presence, high for diminishment, and side for dynamic spacing.
  • Introduce layers: add subtle foreground/background elements or leading lines to enhance depth, even in minimal compositions.

Technical Camera Settings & Depth Control

  • Use a wide aperture (e.g., f/2.8–f/5.6) to isolate subjects and convert backgrounds into smooth, soft negative space.
  • Utilize your camera’s built‑in grid overlays to follow compositional guides and correct framing in-camera.
  • Choose low ISO settings (ISO 64–100) to maintain tonal clarity in shadows and prevent noise, especially in low-key setups.

Composition Rules That Complement Negative Space 

 Negative Space In Studio

Rule of Thirds (and Lead Room)

  • The frame is divided into a 3×3 grid—two equally spaced horizontal and vertical lines.
  • Position your subject at one of the four intersections, not centered, allowing the remaining grid areas to serve as negative space.
  • If the subject is looking or moving in a direction, leave extra space (“lead room”) in that direction to create visual flow and avoid a cramped frame.

Leading Lines

  • Use linear elements, such as shadows, architectural lines, and pathways, to guide the viewer’s eye from the edge of the negative space toward your subject.
  • Frame your lines so they originate in the negative space and converge toward the subject, enhancing compositional depth and focus.

Symmetry vs. Asymmetry Balance

  • Symmetry: Align subject and negative space symmetrically (e.g., centered subject with equal space on either side) for a sense of calm and visual stability.
  • Asymmetry: Position your subject off-centre with more negative space on one side by distributing visual weight through elements like size, color, texture, or line to balance the scene.

Common Mistakes and How to Avoid Them 

 Guide To Negative Space In Studio

1. Overpowering the Subject with Empty Space

Too much negative space can make the subject appear insignificant or get “lost” in the frame, thereby diluting its visual impact.

2. Cluttered or Distracting Backgrounds

Background elements like stray objects, textures, or busy patterns can conflict with the intended empty space and divert attention from the subject .

3. Lack of a Clear Focal Point

When the subject is too small, too far, or placed ambiguously, viewers’ eyes wander without an anchor, a common negative space photography mistake.

4. Unbalanced Composition

Neglecting the balance between positive and negative regions, either asymmetrically heavy on one side or with aimless empty space, can result in uneasy or chaotic compositions. 

5. Unintentional Negative Space

Verbatim empty areas (e.g., empty sky above a portrait) that serve no purpose or visual context can make images feel accidental or unpolished.

6. Poor Use of Light and Tonal Contrast

Flat, uniform lighting often caused by inadequate studio photography equipment, such as undersized softboxes or missing flags, can render negative space inert and visually unhelpful.

7. Floating Subject (Lack of Connection to Space)

When the subject feels “detached” or floating, without visual links to the surrounding space, it undermines cohesion in the image. 

8. Misplaced Cropping or Edging

Subject cropped awkwardly (e.g., too close to the edge or with excessive headroom) disrupts balance and framing, making the negative space feel misplaced.

Editing and Post-Processing Tips for Enhancing Negative Space

Negative Space


Crop Overlay & Framing Precision

  • Use cropping tools with Rule-of-Thirds or Golden Ratio overlays to enforce intentional spatial ratios and eliminate edge artifacts. This technique applies to both stills and frame composition in videography services for clean and intentional visuals.

Exposure Manipulation & Tonal Control

  • Tweak exposure, highlights, shadows, whites, and blacks to optimize the luminance distribution of negative regions.
  • Utilize histogram clipping awareness to maintain detail while ensuring tonal separation.

Local Adjustments with Masks

  • Another essential step in editing tips for negative space photos is to employ brush masks, gradient masks, and radial filters to isolate negative space for precise tonal or color edits.

 Dodging & Burning Workflow

  • Apply darkroom-inspired dodging to lighten negative space and burning to deepen tonal contrast around the subject. 
  • Use Lightroom’s local exposure tools or Photoshop layers to subtly manipulate spatial emphasis.

 Desaturation & Color Harmonization

  • Adjust HSL panels to reduce saturation or adjust the luminance of background tones to prevent tonal competition with the subject.

 Blur Techniques & Bokeh Utilization

  • Simulate or enhance background defocus to simplify negative space, use Gaussian blur, or encourage bokeh via wide apertures.

Color Grading & Tonal Cohesion

  • Ensure consistent tonality using global adjustments or lookup tables, aligning negative-space color to the subject’s aesthetic without overpowering it.

 Structured Workflow & Iterative Refinement

  • Follow a methodical sequence: RAW conversion → global exposure → crop/compose → local masking → dodge/burn → color grade → sharpen/export.
  • Iterate with multiple crop variations and exposure versions to select the optimal spatial narrative.

Conclusion 

Now that you know how to use a negative space in studio photography, all left is to find an ideal professional photo studio rental in New York City. Check out Grattan Studio in East Williamsburg, Brooklyn, a spacious, well-equipped photo studio with top-tier Profoto lighting, high ceilings, and a clean backdrop setup. It’s the perfect environment to experiment with negative space. 

Book a session via info@grattanstudios.com or call 347‑372‑3915. Create with intention, and make your next images stand out!

Top Advertising Photography Trends to Watch in 2025 (Your Guide)

Advertising photography keeps evolving, shaping how consumers see brands through powerful visuals and storytelling. In the coming year, brands are moving past outdated looks and embracing hyper-realistic AI images, immersive 3D photography, and emotional storytelling. These major trends will catch consumers’ attention, spark urgency, improve brand recognition, and boost sales. That’s why brands and photographers alike need to stay on top of what’s trending in the year ahead.

To help you out, this blog covers all the key advertising photography trends that are set to take over in the next year.

Trend #1: Sustainability-Focused Visuals

Consumers are becoming more environmentally conscious, so much so that they want to know how a product or service impacts the planet. This has led brands to adopt sustainability-focused visuals that match their ethical values and responsible practices while resonating emotionally with the consumers. Visually showcasing this commitment helps businesses stay relevant and build stronger connections with their audience. 

Owing to this trend, advertising photographers are using organic textures, natural lighting, recycled materials, and more in their shots. Also, they are keen on highlighting biodegradable packaging and processes that the brand uses to reduce carbon footprint and improve brand image. For instance, major beauty brands like The Body Shop are incorporating sustainability-focused visuals by showcasing their products with eco-friendly packaging, compostable wrapping, and refillable containers.

Trend #2: Authentic And Unfiltered Photography

This is one of the most significant trends in commercial advertising photography as consumers are getting tired of overly staged and edited images and craving for something real. Authentic photography in advertising mainly features real individuals rather than models, natural expressions, and real-life moments to create unfiltered and relatable images. Its goal is to create emotional connections by humanizing the brand and emphasizing imperfection that further reveals authenticity and personality. A great example of this is Dove, which has adopted this trend by showcasing real skin tones and textures in its advertising campaigns instead of projecting unrealistic portrayals of flawless skin.

So, this photography trend will continue to grow and help bridge the gap between businesses and their audience, building loyalty and engagement. It will also help brands convey their commitment to sincerity over superficiality, resonating with potential clients who prioritize honesty.

Trend #4: Inclusive and Diverse Storytelling

Inclusive and diverse storytelling in advertising photography is not just a trend but a necessary shift toward a broader and more accurate reflection of the consumer base. Brands in the upcoming year will utilize the storytelling trend in their imagery and create more relatable and authentic campaigns that will resonate with their diverse audiences. This diverse representation, inclusive of different backgrounds and identities, not only boosts customer loyalty but also aligns with social and corporate responsibility.

Consumers today are increasingly aware of a brand’s values and expect brands to make meaningful contributions to social change. For example, the SKIMS’ Adaptive Collection campaign, launched by Kim Kardashian’s shapewear brand, showcases models with disabilities, including wheelchair users and individuals with limb differences. 

A commercial advertising photographer showcasing this inclusivity can help brands demonstrate their willingness to engage with real-world issues and fight for rights. Thus, inclusive advertising photography opens the door to a wider market, leading to increased reach, engagement, and sales.

Trend #5: Immersive 3D And Augmented Reality (AR) Photography

fashion style posing with tv

Immersive 3D photography involves creating hyper-realistic, three-dimensional product visuals that allow customers to explore every angle with lifelike detail. Meanwhile, AR photography blends digital elements with real-world environments, enabling consumers to interact with products virtually using their smartphones, tablets, or AR headsets. These advanced visual technique offers a highly interactive experience that static images cannot match, making this game-changing trend rise to the top. 

This trend changes traditional product photography by offering the audience an experimental way to engage and helps brands shine in the crowded advertising space. For instance, brands like Gucci and Dior have integrated AR-powered ads on social media platforms, allowing users to ‘try on’ products like sunglasses or sneakers through their smartphone cameras. This helps the audience visualize how the products will look on them in real time before making a purchase, breaking away from traditional two-dimensional advertising and bridging the gap between online and offline shopping.

Additionally, photographers providing AR-powered advertising photography and videography services create a sense of immersion and bring in-store shopping material to digital platforms. This reduces uncertainty and increases buyer confidence.

Trend #6: Minimalist Aesthetic With A Focus On Negative Space

Minimalism has been a powerful trend in advertising photography for years, but in the coming year, it’s set to take the spotlight with a focus on negative space. This trend highlights simplicity, clean backdrops, soft, natural light, and the intentional use of empty space to highlight a product or brand message. It strips away all the extras and keeps the core subject front and center, creating balance and drawing the viewer’s eye right to the product or service. This trend will pick up even more momentum next year as the market, overwhelmed by cluttered visuals, looks for clean imagery that delivers its message. This helps grab attention and improves how people see the brand.

On top of that, negative space makes it easier to add text overlays like call-to-actions (CTAs) and brand messaging, which will boost this trend’s popularity—especially in digital ads and on social media.

Trend #7: Mobile-First Advertising Photography

fashion style posing with camera

The majority of consumers are engaging with content through their smartphones, which makes mobile-first advertising photography one of the top trends that will keep ruling. Social media and E-Commerce platforms have also started allowing direct shopping through images, creating the need for shoppable images, vertical formats, and carousel ads. This has led the brand to ensure that its visuals are optimized for mobile screens and deliver high-impact images that capture the attention of the audience scrolling through shopping apps and mobile websites. For instance, Nike’s mobile-first campaigns on social media platforms utilize vertical images that seamlessly blend with users’ feeds, while their carousel ads showcase different angles of a product.

Additionally, advertising photographers must utilize bold compositions with vertical (9:16) and square (1:1) aspect ratios to ensure full-screen visibility, impacting framing and branding. Photographers must also use AI-driven mobile editing tools and adaptive photography techniques like background removal and auto-cropping for different images and video compatibility with various platforms. These photography services ensure that your advertising images maintain high quality across various mobile formats.

Trend #8: Motion Photography (Cinemagraphs)

Cinemagraph is a hybrid between a photo and a video, where a subtle and continuous motion occurs within the still image. This instantly grabs the attention of viewers and keeps them engaged for a longer time compared to a traditional static image. Motion Photography (Cinemagraphs) will stay on top even in the next year for its ability to enhance brand storytelling. For instance, steam rising from a coffee cup or a gently flickering candle in a home decor ad will capture more visual interest. Since the cinemagraphs stand out among static visuals, they often result in higher click-through rates and better conversion rates. 

This commercial photography trend specifically caters to shorter attention spans as they load quickly, loop seamlessly, and do not need sound, making them perfect for website banners, social media campaigns, and showcasing products or services. It can also work as a compelling strategy to improve brand awareness and boost sales.

Trend #9: Typography Integration

Typography integration is an impactful trend that combines oversized and eye-catching fonts with photography to make the message stand out. This involves styles like 3D lettering, embossed effects, neon-style text, and even handwritten fonts, depending on the brand’s identity and messaging goals. This trend is gaining more momentum due to its instant visual impact, which is perfect for a time when people quickly scroll past content. Luxury fashion brands like Balenciaga and Prada have successfully used bold typography over black-and-white imagery in their ad campaigns. 

As minimalistic visuals remain the priority of advertising product photography, bold typography enables brands to maintain a clean aesthetic while still delivering a powerful message. Further, custom typography can help improve brand recognition as businesses consistently use fonts on visuals to create a different identity that their potential customers can remember.

Conclusion

Now that you know the top trends of the upcoming year, it’s time to capture impactful visuals that will keep your brand relevant. So, book a photo studio at Grattan Studio today and create eye-catching visuals that truly connect with your audience!